Too much pigment is the standing explanation for a pale pearl bait, and it is only one of four. The other three leave the same washed-out body. Orientation is the usual culprit: a platelet that never turned has nothing to flash back at you, and no extra gram of powder puts it right. What follows settles which fault you are looking at, and what loading the pour will carry.
What a Pale Body Is Actually Missing
A pearl pigment does not tint plastisol the way a dye does. It returns light. Every platelet is a flat flake carrying a thin oxide film, and that film decides which wavelengths come back strongly at a given viewing angle.[1] Shine a lamp on one flake and the answer leaves in a single direction.
A colour needs a crowd. When the flakes agree on an angle, the body flashes as one surface. When they tilt at random, the same light scatters every way at once, and the eye records that as pale and flat rather than as a hue. The pigment is still in there, doing nothing you can see.
That distinction decides your next move. A clouded bait usually still holds its hue. What it has lost is the narrow band of angles over which the body looks bright, and extra pigment does not reopen that band.
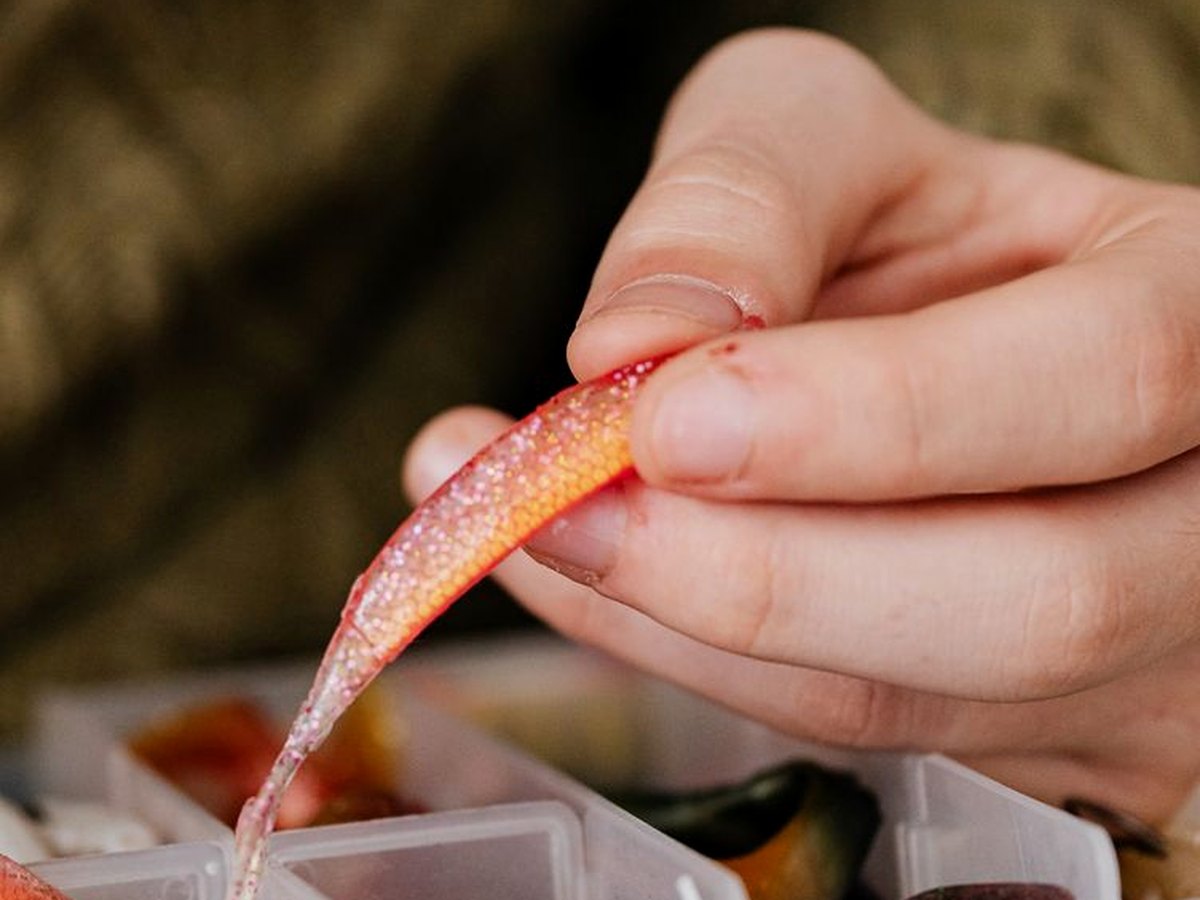
Figure 1. A poured soft bait held up to the light. The sparkle is a set of platelets sitting at a consistent angle inside the body, not a coating on the outside of it.
The test costs one sample and a desk lamp. Turn the piece slowly and watch for the position where it suddenly gains brightness. If that position exists, orientation is partly intact and you are chasing a loading or a dispersion fault. If brightness stays flat through the whole turn, the flakes are pointing in unrelated directions and the fault sits in the process, not in the drum.
Rule out the milky pour before you touch the pigment. Water, unmelted plastisol and an incompatible additive each leave a haze that does not move as the part turns. The rotation test separates all three from an orientation fault in seconds, and none of their remedies resembles the others'.
The Three Moments Where Orientation Is Decided
A platelet has to rotate into place before the pour sets. Viscosity, section thickness and cooling rate each decide whether it gets that chance, and each acts at a different moment, which is why a correction applied at the wrong moment changes nothing.
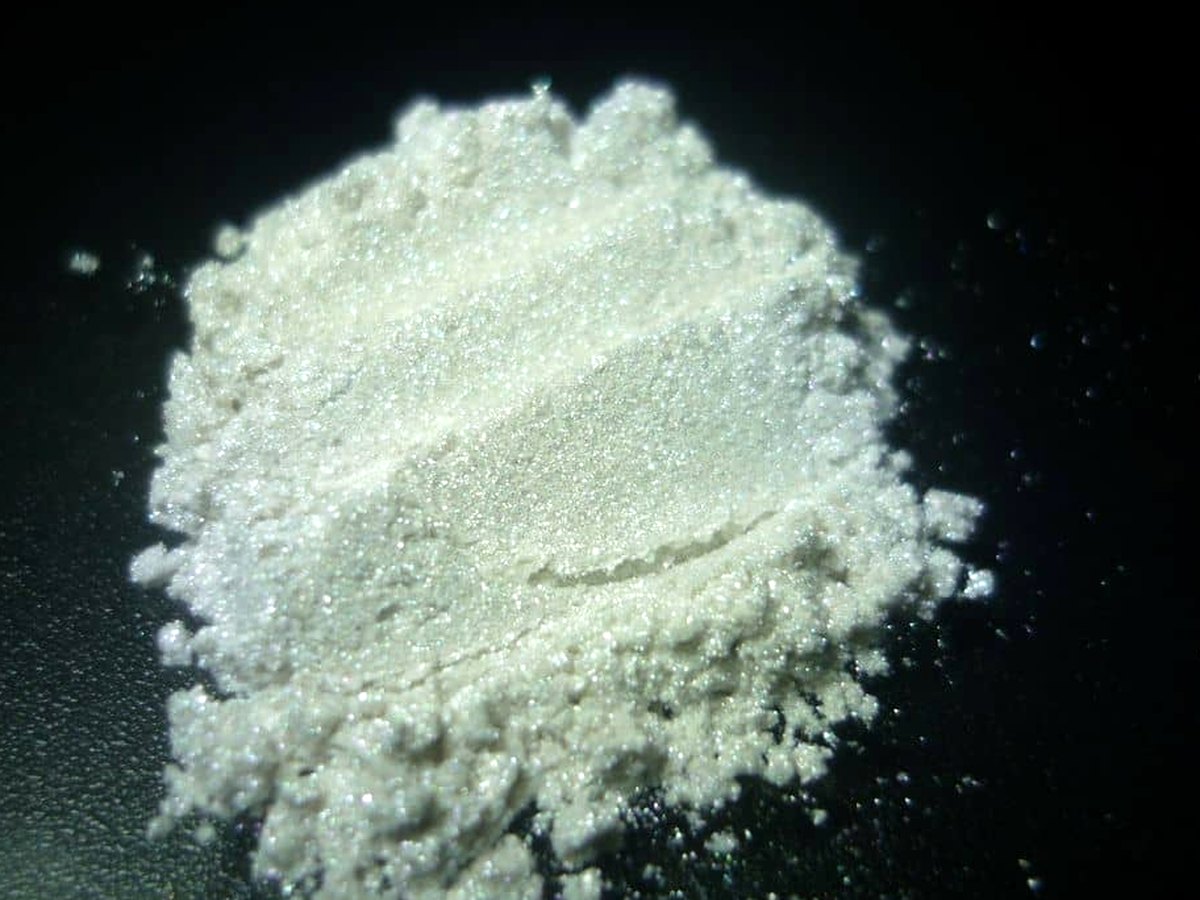
Figure 2. A silver-white pearl grade as supplied. The flake is roughly 0.3 to 0.5 micrometres thick and several microns to a few hundred microns across, so it is a plate, not a grain.
Viscosity decides whether the plate can turn at all. In thin, hot plastisol it turns freely and keeps travelling, so it drifts out of position or sinks. In a paste that is already too stiff it never starts moving and stays where the mixer left it.
Section thickness decides how many layers of plate the body can hold at one angle. A slender worm or a thin tail puts a wall close to every flake. A thick body leaves the middle of the section free to drift, and the core reads duller than the skin even when the pour was sound.
Cooling rate decides the deadline. Plastisol clears at around 177 °C and sets on the way down, so the window in which a flake can still move closes somewhere during that descent. A room-temperature mould in a cold shop shuts it quickly, and the skin freezes at whatever tilt it happened to be holding.
The same forces govern a platelet layer in a coating, which is why the effect-pigment literature treats orientation as a property of the process rather than of the grade.[1] A grade can be written on a purchase order. Orientation has to be earned in the pour.
Four Faults That Look Like One Pale Body
Most cloudy pours get filed under too much pigment, and that file is worth opening. Four separate faults produce a washed-out body that looks much the same, and each one leaves its own signature if you know where to look.
| Cause |
What it looks like |
How to tell it apart |
What actually changes |
| Loading past the hiding point |
Pale and opaque, the see-through quality gone, but the body still flashes when turned |
Halve the loading in one test pour; brightness returns without touching the process |
Lower the percentage, or accept a solid colour and stop chasing depth |
| Flakes not oriented |
Pale grey-white that brightens at no angle; worse in thick sections |
The rotation test finds almost no bright position; a thin test piece looks better than the thick one |
Pour temperature, mould temperature, section thickness, cooling time |
| Agglomerates left in the mix |
Speckles and small dull patches, colour streaking from one end of the mould to the other |
A thin smear on glass under a lamp shows clusters; the effect reads unevenly across a single part |
Wetting and dispersion before the pour; shear that breaks clusters up without grinding the flakes |
| Base not fully fused |
Milky body with the pigment spread evenly through it; the haze does not change with viewing angle |
A clear control pour with no pigment in it is already cloudy, so the fault predates the colour |
Oven time and temperature, plasticiser ratio, moisture in the resin |
Only the first row is a pigment question in the sense a supplier usually gets asked. The other three are process faults, and a loading change will not touch any of them. Add pigment to cover them and the body goes paler while the real cause sits exactly where it was.
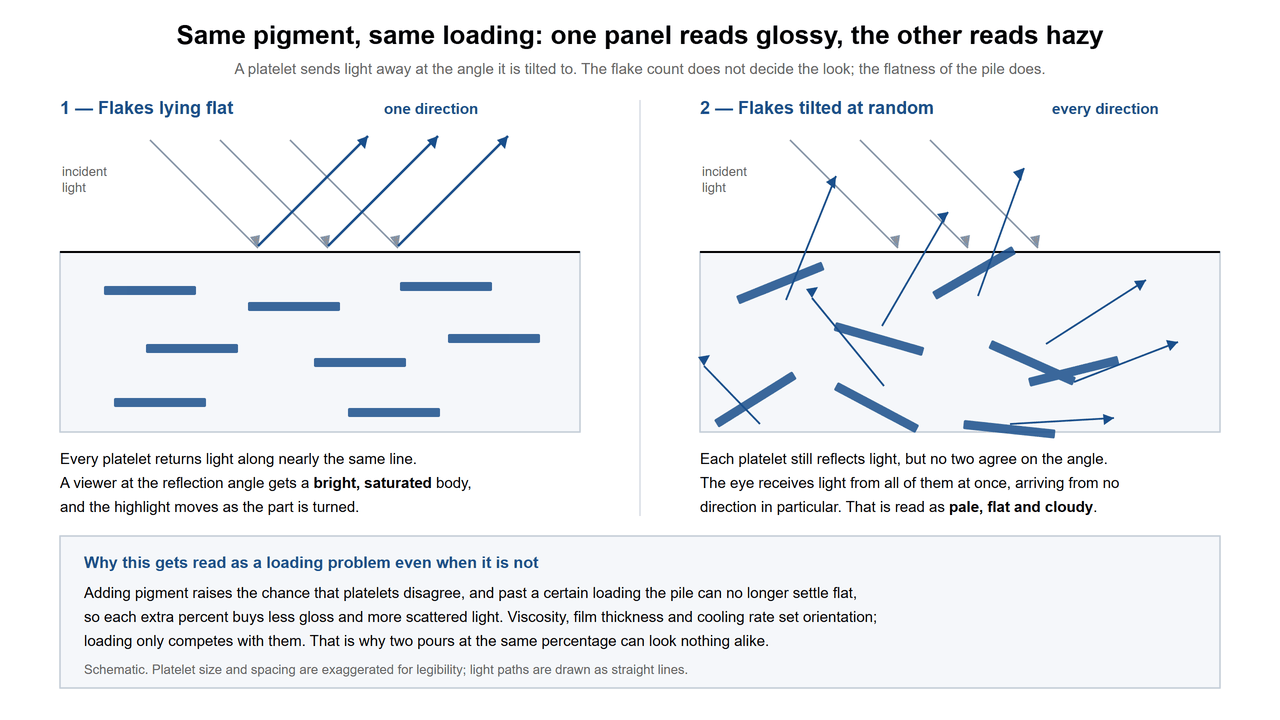
Figure 3. Why the same pigment reads as gloss in one pour and as haze in another. Flakes that agree on an angle return light in one direction; flakes that disagree return it in all of them.
Orientation loss is measurable, not theoretical. Simulation work on injection-moulded plate-filled parts predicts the tilt distribution through a section from the filling flow, and finds the visible defect coming from misalignment rather than from pigment content.[3] Coating studies arrive at the same place from the other side: hold the flake loading constant, change the application conditions, and the measured reflectance moves with them.[4]
The older coating work carries a warning worth keeping. A near-spherical extender disturbs platelet alignment and shifts the measured colour values even though nothing about the pigment itself has changed.[2] Anything in the mix that is not a plate competes with the plates for the room they need to lie down.
Setting a Loading You Can Defend
Published starting points for mica pigments in plastics sit at 0.5 to 2 % by weight, with 1 to 3 % used where a soft bait has to read clearly, and visible hiding appearing somewhere above 3 to 5 %. Those are starting points for a material class, not a recipe for one bait.
Directional gloss and haze do not follow the same curve. Gloss climbs with loading, peaks, then falls away; haze only climbs. Past the point where the two cross, the eye is reading haze, and every further increment of pigment makes the body worse rather than deeper. That crossing is why a pour turns paler the moment you top it up, and it is the reason to find the top of the curve by casting test pieces instead of by adding powder until something looks right.
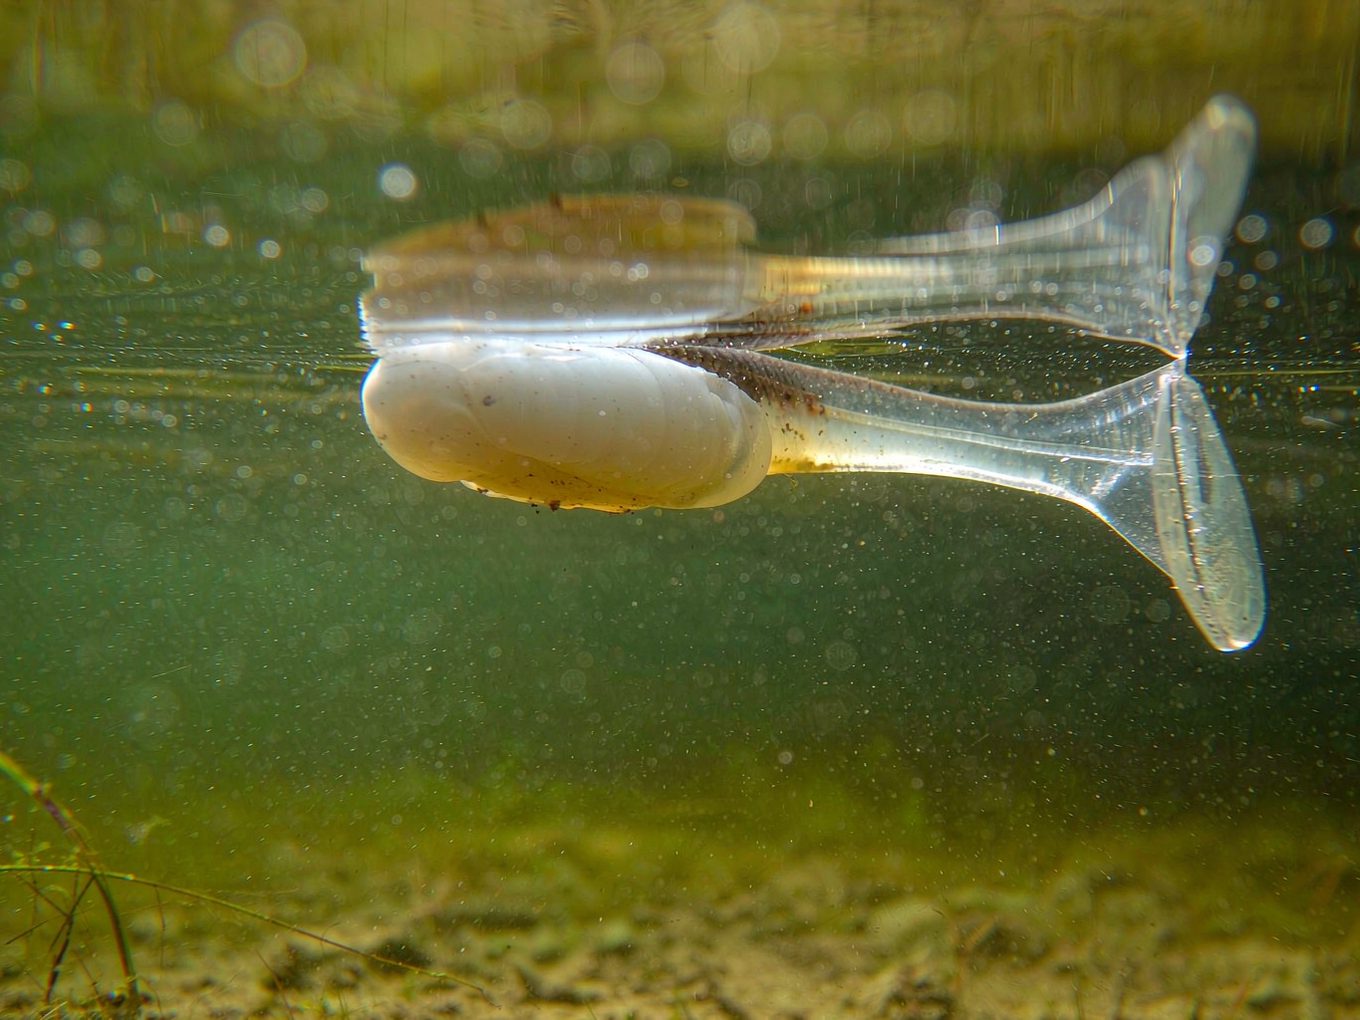
Figure 4. A pearl-white swimbait retrieved through shallow water. Dense at the head, translucent at the thin tail; where a poured body sits between those two is set at the mould.
Test in steps rather than guessing. Start at 1 %, move in 0.5 % increments, and stop at 3 % unless you have decided on purpose that the bait should be opaque. Cast every step in the same mould, at the same temperature, in the same session, or you will be comparing pours instead of loadings.
Record two things at each step: whether a bright position exists when the sample is rotated, and whether the body still transmits light. Those two notes tell you which of the four faults above you are actually facing, and at the bench they are worth more than a photograph.
Particle size belongs in the same decision. The 5 to 25 micrometre band settles less and sits more evenly through a soft body, and you pay for it with a smaller sparkle. The standard 10 to 60 micrometre band is the usual compromise. Bands above 100 micrometres sink in a hot pour and leave the upper face of the mould pale.
On the bench, a fine satin silver covers the fine end of the size scale, and a standard silver-white makes the working baseline every other pour is judged against. Where the flank has to shift toward green or blue instead of sitting neutral, an interference grade does that job, and it reads properly only in a body that still transmits light.
Sourcing and Ordering
Pearl grades for plastisol ship as dry powder in 5 kg minimum order quantities, across the fine satin and standard silver-white bands. Name the size band and the target plastisol system when you ask: one colour name exists in several bands, and the band decides how the body reads.
A custom sample pack built around your application is the usual way to start. Tell us the band, the loading you are working at and the section thickness you cast, and the pack is put together against those three rather than against a colour chart. Lead time and pricing follow the band and the quantity, and the quote is written against your specification rather than a stock list.
We hold an ISO 9001:2015 certified quality management system. Certificates and compliance documentation covering REACH, RoHS, Halal, Kosher and US FDA registration are provided on request for the required grade and target market.
Before you specify, the Kolortek 100 silver white series catalogue sets out the working baseline, and the pearl pigment colour cards cover the interference and metal luster colours that sit alongside it.
Frequently Asked Questions
Can I colour soft plastic baits with mica powder?
Yes, and it is the usual route to a metallic or pearlescent body. Two things decide the result: the size band and the point of addition. A fine band stirred into hot, clear plastisol disperses and orients. A coarse band dropped into a cooling pour gives speckle and sink.
Why did my bait turn cloudy when I added more pigment?
Past a certain loading the flakes can no longer lie flat together, so the light they return loses its preferred direction. The hue stays. The angle at which the body looks bright does not. Run the rotation test first: if a bright position still exists, the pour was simply loaded past its hiding point, and the correction is a weighing change rather than a process change.
Does the pearl effect disappear if the bait gets scratched?
Not the way it does on a painted hard bait. In a poured soft body the flakes run all the way through the material, so a scratch exposes more of the same. On a hard bait the effect lives in a film, and a scratch that reaches the primer takes it off locally.
Will fluorescent pigment survive a plastisol pour?
The margin is thin. Fluorescent pigments are rated to about 180 °C, plastisol clears at around 177 °C, and that leaves very little room — none at all for an overheated pot. Two terms get mixed up at this point. A fluorescent colour needs light on it and stops the moment the light goes. A glow-in-the-dark pigment stores energy and keeps emitting after the light is gone, so a bait that has to keep glowing in the dark needs the second chemistry, not the first. Carrier choice for heat-sensitive pigments is set out on our fluorescent pigments for plastics page.
Request a Sample
Send the size band you are working in, the loading that went cloudy, and the section thickness of the part. The pack is built around those three figures rather than a colour chart, and the rotation-test notes travel back with it so your next pour is a comparison instead of a fresh guess. Tell us where the pour went pale and we will start from there.
References
[1] Maile, F. J.; Pfaff, G.; Reynders, P. Effect pigments—past, present and future. Progress in Organic Coatings, 2005, 54(3), 150–163. DOI: 10.1016/j.porgcoat.2005.07.003
[2] Kettler, W. H.; Richter, G. Investigation on topology of platelet-like effect-pigments in automotive surface-coatings. Progress in Organic Coatings, 1997, 31(4), 297–306. DOI: 10.1016/S0300-9440(97)00087-8
[3] Sasayama, T.; Okamoto, H.; Sato, N.; Kawada, J. Numerical simulation of plate-like particle orientation in injection molding. Powder Technology, 2022. DOI: 10.1016/j.powtec.2022.117481
[4] Sung, L.-P.; Nadal, M. E.; McKnight, M. E.; Marx, E.; Laurenti, B. Optical Reflectance of Metallic Coatings: Effect of Aluminum Flake Orientation. Journal of Coatings Technology, 2002, 74(932). NIST publication: https://www.nist.gov/node/603136

 English
 Français
 Deutsch
 Русский
 Español
 Português