
Leave A Message
If you are interested in our products and want to know more details,please leave a message here,we will reply you as soon as we can.
Color Shift Pigment for Printing Inks: Primer Choice and Delamination Risk
Reverse-printed color shift ink sits inside the laminate, not on its surface. Loading, cell depth and a 1.5 N/15mm bond target decide whether the pack survives.
A reverse-printed color shift ink sits inside a laminate, not on top of it. The pigment is dispersed at roughly 20% in a solvent ink, printed into cells etched 45–70 μm deep, then buried under an adhesive and a sealing film. Once buried, the number that decides whether the pack survives is not adhesion to the film. It is bond strength: above 1.5 N/15mm.
Reverse printing inverts the usual order. The ink goes down first, on the inner face of the outer film, and everything else is built behind it: adhesive, then the sealing layer that will face the product. The printed image is therefore read through the outer film, from the outside in.
That arrangement changes what a color shift pigment is being asked to do. In a surface print, the ink layer is the wear surface and adhesion to the substrate is the weak point. In a reverse print, the film protects the ink and the interface that fails is somewhere inside the sandwich.
Three consequences follow, and each one moves a different number. Abrasion and scuffing are handled by the film, so ink hardness matters less than expected. The color the buyer sees is filtered by the film, so film haze and thickness sit in the optical path. And the layer that can peel is not the ink-to-film interface alone, but every interface in the stack.
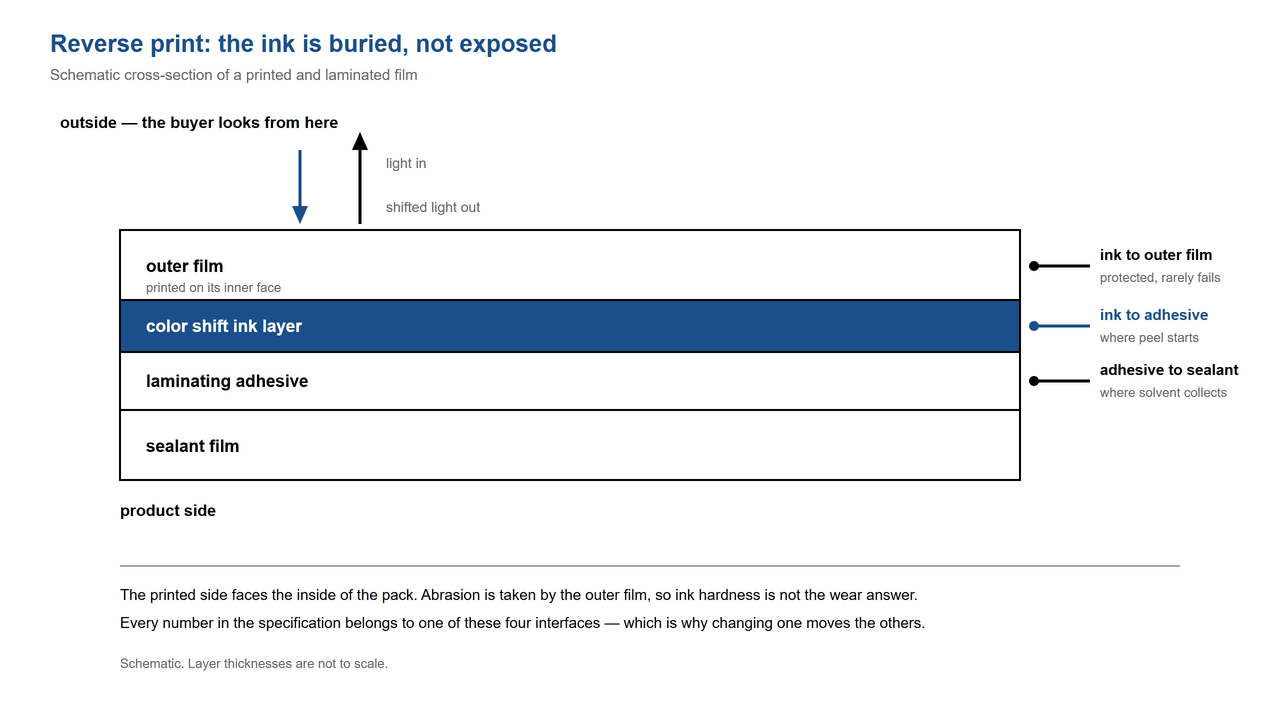
Cross-section of a reverse-printed laminate. The color shift ink layer is buried between the outer film and the laminating adhesive, so the viewer reads the effect through the film.
This ink system is documented for gravure printing on nylon film, at a stated press speed of 60–150 m/min and a shop-floor temperature between 18 °C and 30 °C. Nylon is not a neutral choice. It absorbs solvent differently from a polyolefin, and it stretches, so register and drying both behave in their own way.
Viscosity is the parameter that ties the rest together: 40–60 seconds on a Zahn 2 cup at 23 ± 1 °C. Below that band the ink runs and the cells empty unevenly. Above it the ink cannot release from the engraving cleanly, which shows up first as mottled color travel and later as a heavy, slow-drying film.
Temperature matters because it changes viscosity without anyone touching the formula. A workshop at 15 °C and one at 32 °C are running two different inks from the same drum, which is why our application sheet puts a band on ambient temperature rather than only on the ink.
If your structure is not nylon, the starting point still holds but the numbers do not transfer. Treat the bands here as the reference for this documented system, and confirm them on your own press before committing a run. The printing applications page covers the surrounding processes.
Three settings decide the result, and the order matters because each one constrains the next. Loading sets how much pigment is available to travel. The solvent blend sets how that pigment moves and how fast the film dries. The dryer sets whether anything is left behind.
For gravure, the documented pigment addition is around 20% in the finished ink, alongside a synthetic resin, organic solvents and additives. That figure is high by the standards of ordinary colorants, and it is high because a color shift effect is built from flat platelets that each contribute a narrow band of reflected light.
Three blends are specified, each paired with a speed band. The ratios are parts by weight, and the ether component is what slows evaporation when the press runs slow enough that a fast solvent would skin over in the cell.
Note the gap in the source document, because it matters when you plan a run. The application scope states 60–150 m/min, while the blend table runs from 60 to 200 m/min and a later paragraph mentions up to 250 m/min. We give all three as published rather than averaging them, and we treat anything outside 60–150 m/min as a case for a print trial.
Drying is specified at 60–100 °C. The low end is not there to be gentle on the pigment, which is inorganic and unaffected at these temperatures. It is there because the film and the adhesive underneath have their own limits, and because a film that dries too fast can trap solvent under a skin.
Solvent that stays in the ink does not simply evaporate later at room temperature. It migrates into the adhesive during lamination and cure, where it softens the bond and produces the bubbles and creeping peel that get blamed on the adhesive supplier.
The acceptance figure for this ink system is a bond strength above 1.5 N/15mm, measured to GB 8808. That is a laminate property, not an ink property, and it is the number most often missed because the color looked right on the reel.
Four things pull that number down, and only one of them is about the pigment itself. The other three are process decisions made on the press, which is why a change of operator can move bond strength without any change to the formulation.
| Where it starts | What you see | What to check | Who changes it |
|---|---|---|---|
| Ink film too heavy | Peel is clean but weak across the printed area only | Cell depth against the 45–70 μm band; pigment loading above 20% | Engraver, ink maker |
| Residual solvent | Bubbles or haze that develop after lamination, not at it | Dryer within 60–100 °C; press speed against the blend used | Press operator |
| Dried ink and contamination | Isolated spots with no bond at all | Second run filtered at 100 mesh, stirred at or below 1000 rpm | Press operator |
| Ink mixed with another ink | Patchy bond and dulled travel across the whole run | Lines and drums kept separate; nothing blended in | Ink maker, press operator |
An anchor coat is a separate question, and it is not answered by the pigment. Whether you need one depends on the film's surface energy after treatment and on the adhesive system, so the decision belongs with the converter and the adhesive supplier. What the pigment changes is the cohesive strength of the ink layer itself, which is why loading and film thickness come first.
The engraved depth specified for this ink is 45–70 μm. That range is a volume statement: it fixes how much wet ink leaves the cell on each impression, and therefore how much pigment actually lands on the film. Adding pigment to the drum and deepening the cell are not interchangeable moves.
Platelets need room to lie down. In a film that is too thin for the grade, they arrive at random angles, and random angles average out the effect you paid for. In a film that is too heavy, they lie flatter and the travel reads better, but the layer that has to hold the laminate together is now mostly pigment.
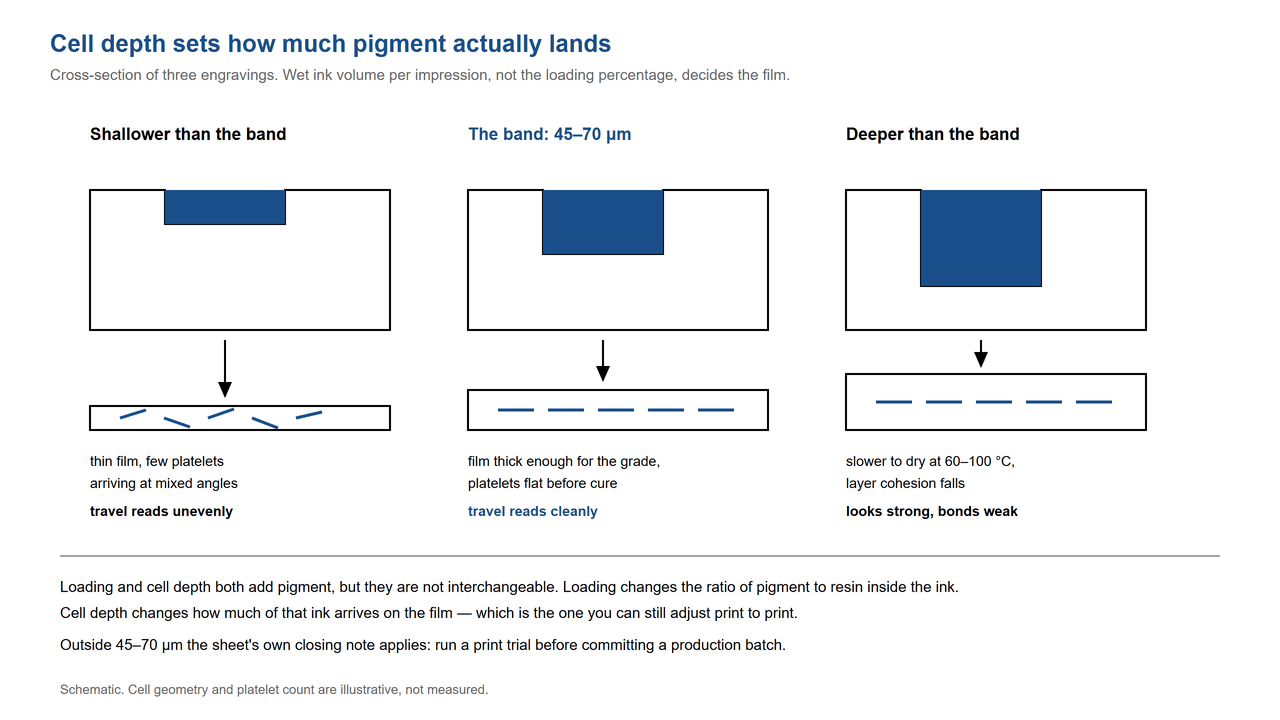
Schematic comparison of shallow, specified and deep engraving. Wet ink volume per impression sets how much pigment transfers and how much room the platelets have to lie flat.
Deep cells and dense pigment create a second problem that has nothing to do with optics: the ink settles. This pigment is heavier than the resin solution around it, so a drum that stands for an hour is no longer the ink that was approved. Stir before use, and on a second run stir at or below 1000 rpm and pass it through a 100-mesh cloth.
The grades themselves are flake-shaped, and the catalogue describes their size as irregular large flakes rather than giving a micron figure. Practically, that means the fit between grade and cell depth is a trial question, not a table lookup. The optically variable pigment range lists what is available to test.
Our application sheet recommends a dark base under the ink: deep red, deep blue, deep green, brown, and black above all. This is not a styling note. Interference color is read against whatever returns from behind the flakes, and a dark base absorbs the light that would otherwise wash the shift out.
Where the design needs a light base, the shift does not disappear, it weakens. The documented remedy is to raise the pigment content, which pushes you back into the film-thickness and bond-strength trade-off covered above. Treat a light base as a cost item, not as a free choice.
For fine line work our application sheet gives measurable limits, which is unusual and worth keeping: line width above 0.15 mm, spacing above 0.2 mm, and a crossing angle generally above 30°. Fewer intersections is better. Below those values the lines are narrower than the platelets reading them, and the effect drops out at the edges.
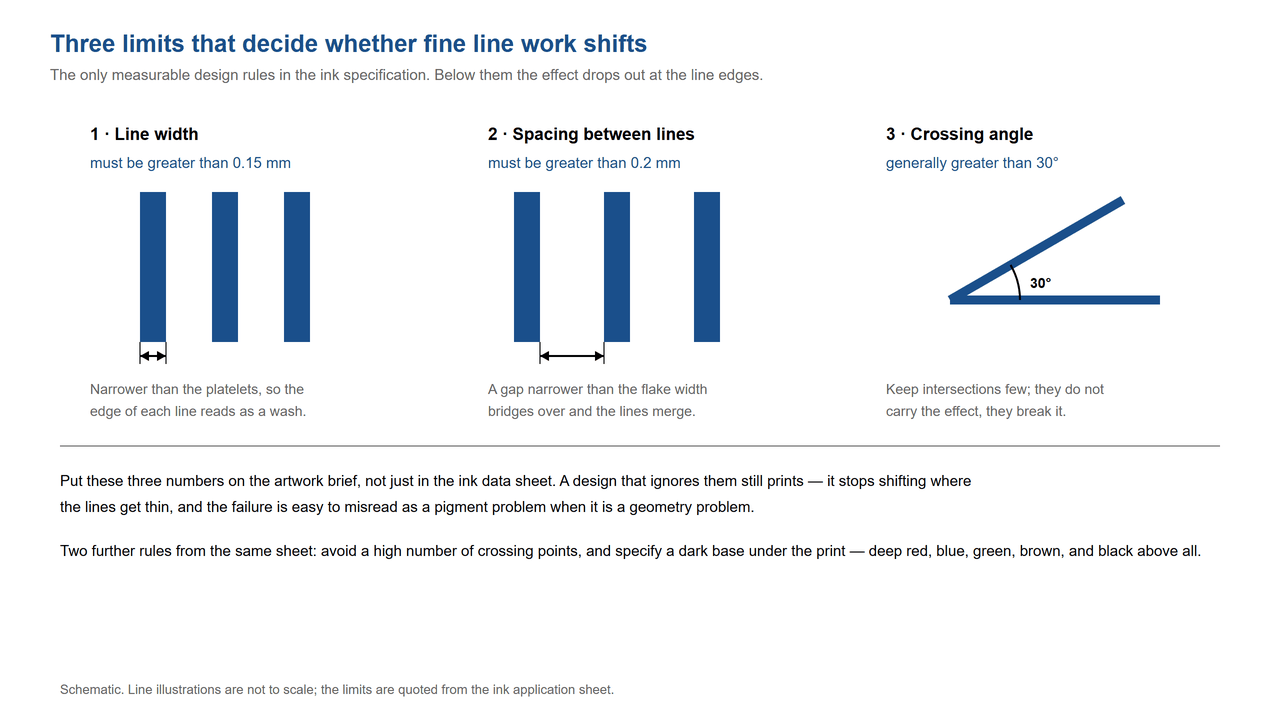
Measurable limits for fine line designs: minimum line width 0.15 mm, minimum spacing 0.2 mm, crossing angle generally above 30 degrees.
Most disagreements on a color shift laminate come from people arguing about a number that was never theirs to set. Splitting the list up front shortens the conversation considerably, and it makes a failed trial readable instead of personal.
Cell depth belongs to the engraver and the plate supplier. Viscosity, solvent blend and pigment loading belong to the ink maker. Bond strength and the adhesive system belong to the converter and the adhesive supplier, measured to GB 8808 against a target they set. We answer for the pigment: its loading window, its dispersion behaviour, and how it reads at a given film thickness.
That split is also why the sheet ends with a note that every customer has to run trials for their own parameters. It is not a disclaimer bolted onto a specification. It is an accurate description of where the responsibility sits in a four-party process.
One boundary worth stating plainly: this page is about packaging laminates. Security documents use the same pigment family for a different purpose, and that work is covered on the security printing applications page rather than here.
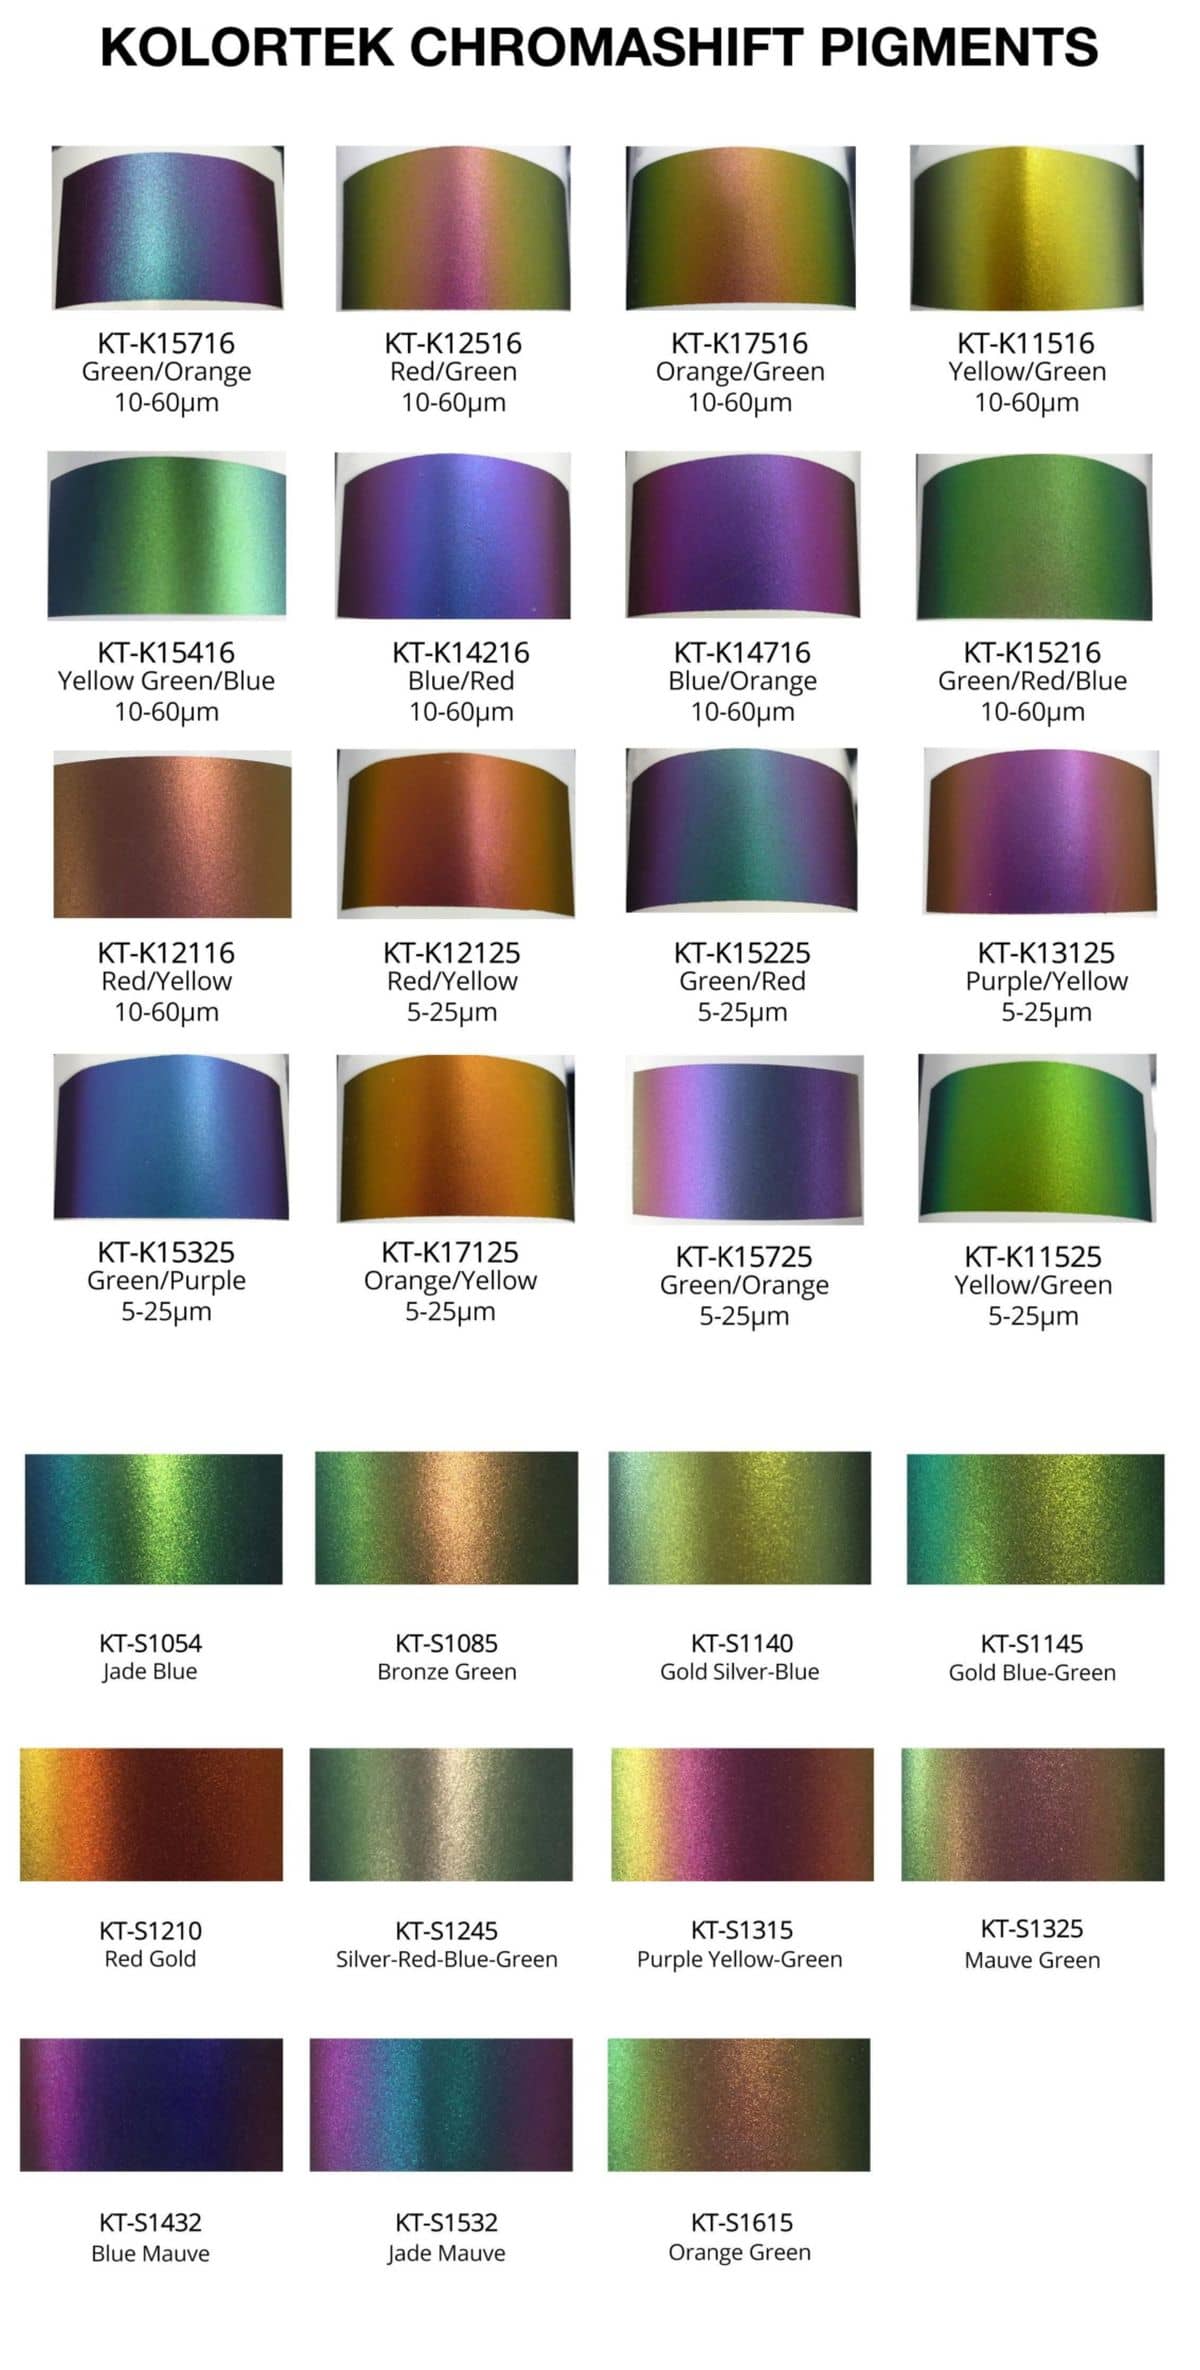
Kolortek Chromashift Pigments
You are now reading it through the outer film, and the adhesive plus the sealing layer sit behind it. Film haze scatters part of the returned light, and a light-colored adhesive or sealant reflects broadband light back through the flakes. Compare the laminated structure, not the reel, against your approved sample.
You can, and you will get a faint travel rather than a strong one. The documented remedy for a light base is a higher pigment content, which thickens the ink layer and puts pressure on bond strength. Decide which of the two you are willing to pay for before the plate is engraved, not after.
Deeper cells transfer more ink, which gives platelets more room to lie flat, but the specified band is 45–70 μm for a reason. Beyond it the film gets slow to dry and the cohesive strength of the layer falls. The band is the working range, not a starting point to exceed.
Technical data and safety documentation are provided, and Kolortek holds ISO 9001 certification; other certificates are supplied on request. Whether a finished pack meets a food-contact or migration requirement is decided by your ink, adhesive and compliance chain, and we do not certify a finished laminate.
The useful inputs are your film structure, the engraved depth you plan to run, the base color under the ink, and the bond target your converter has set. With those four we can tell you which grade to test and what to expect from it, instead of sending a sample and hoping.
A custom sample pack can be built around your application on request. For the full list of optically variable grades and their available forms, take the Chromashift Collection catalogue.
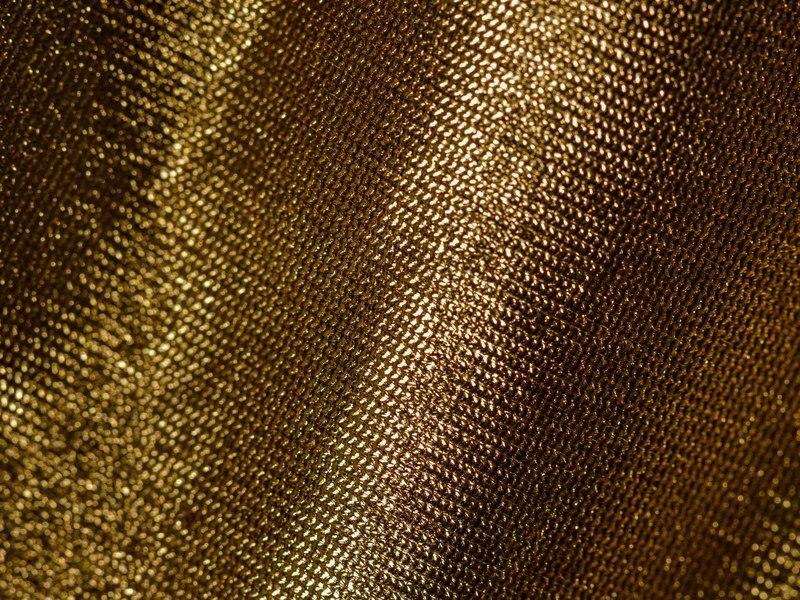
A pearl patch washes out while the flat colour beside it holds. Flakes reflect radiant heat, so that patch cured late. Fix the dwell, not the pigment.
Read More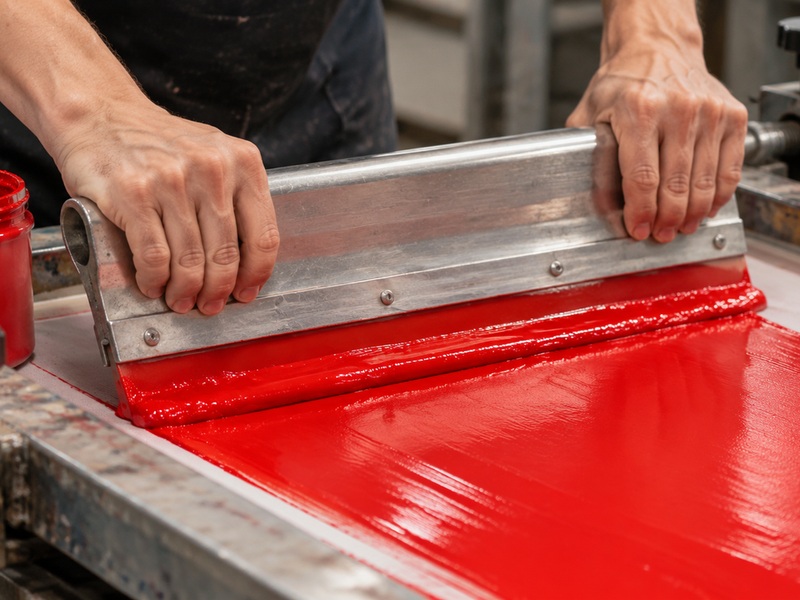
Printing ink pigment is chosen by your press, not by color. Offset tops out at 5–25 µm, gravure runs deeper cells, screen gates on mesh. Send three figures.
Read More
OVI (Optically Variable Ink) pigments are the primary authentication pigment wholesale solution for brand protection and security printing — producing dramatic color-shift effects that cannot be reproduced by scanning, photocopying, or standard printing. At Kolortek, our Chromashift series delivers verified color travel across 17+ shift combinations, meeting the rigorous optical and durability standards required by security printers and brand owners worldwide. For teams managing a bulk order of OVI pigment, we supply in flexible volumes from R&D samples through full commercial production runs.
Read More
Reverse-printed color shift ink sits inside the laminate, not on its surface. Loading, cell depth and a 1.5 N/15mm bond target decide whether the pack survives.
Read More
 English
 Français
 Deutsch
 Русский
 Español
 Português